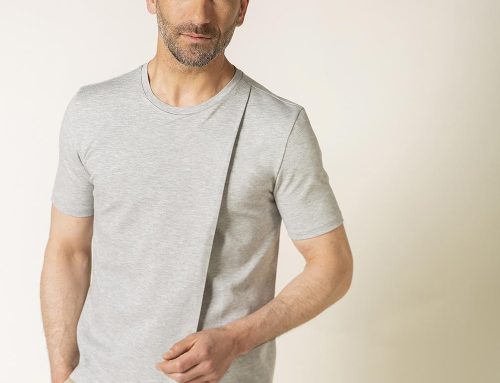
This summer, we’re playing it cool with the Enrico Shirt – an ultra-simple, breezy model that’s just as easy to wear as it is to sew. No buttons, no closures, no fuss. Just slip it on and go.
The Enrico Shirt features a clean, relaxed silhouette with short sleeves, a classic camp collar, and a slightly boxy cut for that effortlessly stylish look. Whether sewn in pastel stripes, linen solids, or playful prints, this shirt brings an easy charm to your summer wardrobe. It’s the kind of shirt that feels at home on the beach, in the city, or at a casual weekend gathering.
And for sewing enthusiasts – beginner or seasoned – this shirt is pure joy. With no buttons or tricky fastenings to deal with, it’s a project that comes together quickly, leaving plenty of room for creativity in your fabric choices.
🧵 Get the pattern and bring on the summer vibes.
📌 Free pattern on Femmes d’Aujourd’hui →
✂️ Translated Sewing Instructions – Enrico Shirt (in English)
Supplies
Lightweight cotton, linen, or viscose fabric
Matching thread
Optional: iron-on interfacing for the collar
Cutting the Pieces
From your fabric, cut:
1 Front Left
1 Front Right
1 Back (cut on fold)
2 Sleeves
2 Collar pieces
2 Collar stands (optional depending on style)
Instructions
Sew the shoulder seams.
Place the front pieces right sides together with the back. Sew the shoulder seams. Press open or toward the back.Assemble the collar.
Place the two collar pieces right sides together. Sew around the outer edges, leaving the neckline side open. Trim the seam allowance, turn the collar right side out, and press. (Optionally, use interfacing on one collar piece for extra structure.)Attach the collar to the neckline.
Pin the collar to the neckline, right sides together. Stitch and finish the seam.Sew the side seams.
With right sides together, sew the side seams of the shirt. Press open or toward the back.Attach the sleeves.
Fold each sleeve lengthwise and mark the center (this aligns with the shoulder seam). Pin the sleeve to the armhole, right sides together, matching notches. Sew and finish the seam.Hem the bottom and sleeves.
Fold the raw edge of the bottom hem to the wrong side by 1 cm, then again by another 2 cm. Press and sew. Repeat the same process for the sleeves.Final press.
Give your shirt a good final press and you’re ready to rock your handmade look.